Let’s deploy Rocket.Chat 6. In 5 minutes. Production Ready.
Here's how:
01The basics
For deploying Rocket.Chat SIX, we are going to need two things:
1 - A GNU/Linux server running on a public IP (eg. 23.23.193.199) on ports 80 and 443
2 - A domain, pointing to that ip (eg. d1.versionsix.demo-rocket.chat)
So whenever you do a domain lookup, it will answer with the IP your server is running, like so:
$ nslookup d1.versionsix.demo-rocket.chat
Server: 127.0.0.53
Address: 127.0.0.53#53
Non-authoritative answer:
Name: d1.versionsix.demo-rocket.chat
Address: 23.23.193.199
This is important because we want to create a valid TLS certificate for that domain. After all, if you want to use Rocket.Chat, you are certainly looking for secure and encrypted communication.
For the TLS/HTTPS encryption part and reverse proxying, we are going to use a great open source software, called Traefik. It will route our traffic to the correct container, ensure that all traffic is encrypted, and take care of the certificate emission and automatic renewal with Let’s Encrypt.
There are more ways to accomplish this, using softwares like Apache, Nginx and even using your own certificates. But for the sake of simplicity, we are going to use Traefik here.
If you do not plan on having your Rocket.Chat server publicly available, you don’t need traefik at all or TLS/HTTPS.
With all that said, let’s get to it.
02Preparing the server
Make sure your server is up to date, on an Ubuntu/Debian server you can make sure of that by running the following commands
$ sudo apt-get update && sudo apt-get upgrade -yReboot once the update is done.
$ sudo reboot
Let’s install Docker! Login to the server, and check if it’s installed already. This is the output of the version I am using for this tutorial:
$ docker --versionDocker version 23.0.1, build a5ee5b1
$ docker compose versionDocker Compose version v2.16.0
> Docker compose v2 is required for this to work. V1 (written in Python) will not work.
If you don’t have docker installed, a nice little command to install it is:
$ curl -L https://get.docker.com | shAfter installing, it is recommended running those two commands, in order to allow your user to access docker services:
$ sudo usermod -aG docker $USER
$ sudo newgrp docker
Now you should be able to run a code like this:
root@mycompany:~# docker ps
CONTAINER ID IMAGE COMMAND CREATED STATUS PORTS NAMES03Download the docker-compose.yml
Rocket.Chat provides a great docker compose template. Let’s use it. First, let’s create a directory. This directory name will be used as our project name. Let's name it accordingly:
$ mkdir mycompany
$ cd mycompany
and now we copy the template:
$ curl -L https://go.rocket.chat/i/docker-compose.yml -OWith that, we have almost everything to run Rocket.Chat. However, without TLS/HTTPS encryption, and listening to port 3000 only.
We need to basically change five variables here. DOMAIN, RELEASE, LETSENCRYPT_EMAIL and ROOT_URL, BIND_IP
So in order to define them, we will download a new file, called .env as it’s never a good idea to change your docker compose directly:
$ curl -L https://raw.githubusercontent.com/RocketChat/Docker.Official.Image/master/env.example -o .envUncomment and change those variables:
### Rocket.Chat configuration
# Rocket.Chat version
# see:- https://github.com/RocketChat/Rocket.Chat/releases
RELEASE=6.0.0
# MongoDB endpoint (include ?replicaSet= parameter)
#MONGO_URL=
# MongoDB endpoint to the local database
#MONGO_OPLOG_URL=
# IP to bind the process toBIND_IP=127.0.0.1
# URL used to access your Rocket.Chat instance
ROOT_URL=https://chat.mycompany.com.br
# Port Rocket.Chat runs on (in-container)
#PORT=
# Port on the host to bind to
#HOST_PORT=
### MongoDB configuration
# MongoDB version/image tag
#MONGODB_RELEASE=
# See:- https://hub.docker.com/r/bitnami/mongodb
### Traefik config (if enabled)
# Traefik version/image tag
#TRAEFIK_RELEASE=
# Domain for https (change ROOT_URL & BIND_IP accordingly)
DOMAIN=chat.mycompany.com.br
# Email for certificate notifications
LETSENCRYPT_EMAIL=duda.nogueira@rocket.chat
For Air Gapped or local deployments, not exposed to the internet, this should be good enough (you will only need to change the VERSION). You can go to the “Let’s Run!” section.
04Adding Traefik to the mix
Now, if we wanted to deploy multiple Rocket.Chat instances on this very same server, we could do it by setting up Traefik. It would then handle different domains and point to the corresponding running containers. For this, you will need to deal with docker networking and change traefik configs a little bit.
For the sake of simplicity, we will run traefik together with Rocket.Chat.
curl https://raw.githubusercontent.com/RocketChat/Docker.Official.Image/master/traefik.yml -O05Let’s Run!
With everything set, it’s time to bring it up
docker compose -f docker-compose.yml -f traefik.yml up -dThis will download everything needed, and run it in the background. After everything is finished, you should get back to the terminal prompt.
Now, to check if they are really running, issue:
docker ps
The output should be similar to:
root@mycompany:~/mycompany# docker ps
CONTAINER ID   IMAGE    COMMAND    CREATED     STATUS    PORTS    NAMES
998e19dca5df   registry.rocket.chat/rocketchat/rocket.chat:6.0.0   "docker-entrypoint.s…"   2 minutes ago   Up 39 seconds   127.0.0.1:3000->3000/tcp   mycompany-rocketchat-1
7187721ae1b3   bitnami/mongodb:4.4     "/opt/bitnami/script…"   2 minutes ago   Up 40 seconds   27017/tcp      mycompany-mongodb-1
81ebb22fd43b   traefik:v2.6.1     "/entrypoint.sh --ap…"   2 minutes ago   Up 40 seconds   0.0.0.0:80->80/tcp, :::80->80/tcp, 0.0.0.0:443->443/tcp, :::443->443/tcp   mycompany-traefik-1
And if you want to check the latest 10 lines of logs, you can do so by running:
docker compose -f docker-compose.yml -f traefik.yml logs -f --tail 10Now, if you point your browser to https://d1.versionsix.demo-rocket.chat
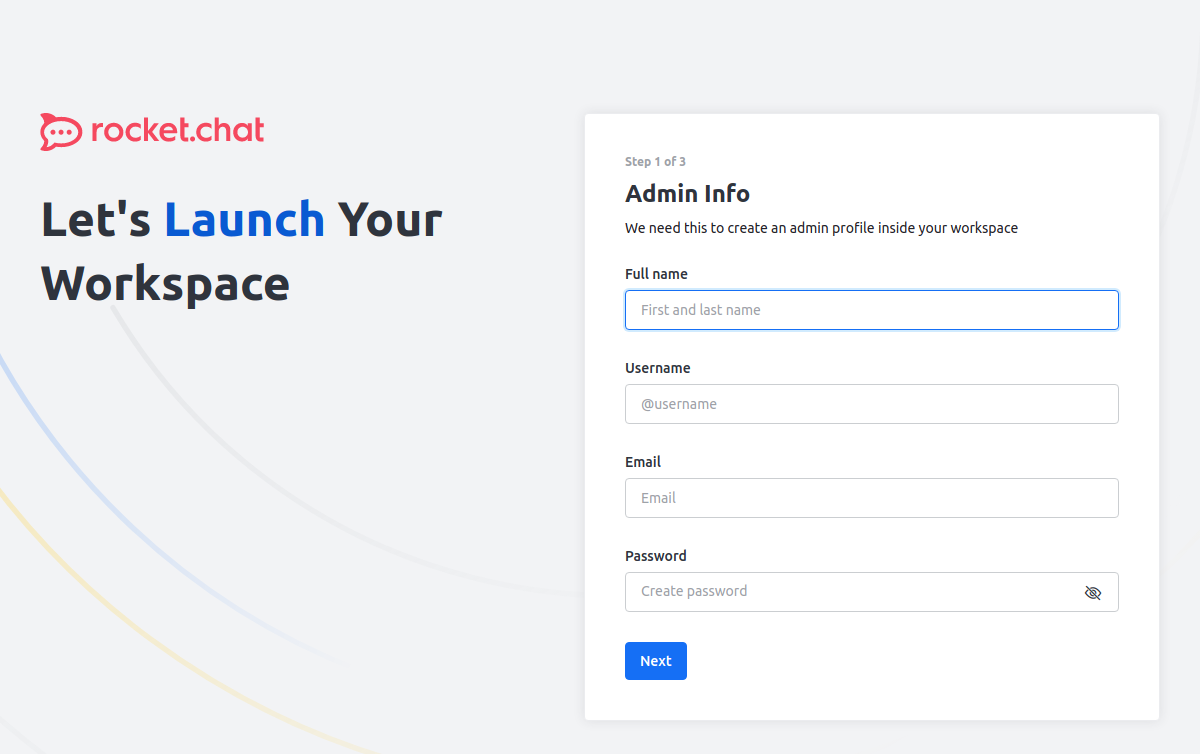
If you see this screen, you are ready to go!